A sealed blind rivet does not seal the entire joint on its own. The paths that remain around the fastener have to be addressed separately.
A sealed blind rivet closes the passage through the fastener itself. Whether the joint is sealed depends on the paths around it.
This is not a product list but a decision order: what has to be closed, which configuration closes it, how the material supports it, and what to confirm before specifying.
When Do You Need Sealed Blind Rivets?
Use a sealed blind rivet when the passage through the fastener must be closed or when the application has a defined containment requirement. A sealed configuration may also be considered when greater containment of the retained stem is needed.
A sealed configuration may not be necessary when there is no containment requirement, when the passage through the fastener is not the concern, or when a conventional configuration already satisfies the joint requirement.
If there is no defined containment requirement, the decision should be based on the actual joint requirement rather than on the rivet name.
Table 1 — When a Sealed Configuration Is Needed
| Joint requirement | Usual direction | Still verify |
|---|---|---|
| No defined containment requirement | A sealed configuration may not be necessary | Exact joint requirements |
| Fastener passage must be closed | Consider a sealed configuration | Exact rivet design |
| Retained stem containment matters | Sealed configuration may be considered | Exact rivet design |
| Moisture or dust affecting the fastener passage | Sealed configuration may be considered | Hole, interface and environment |
| Air or gas containment | Separate engineered sealing solution | System-level verification |
| Pressure-rated duty | Separate engineered solution | System-level verification |
The starting point is the requirement, not the rivet.
What Does a Sealed Blind Rivet Actually Seal?
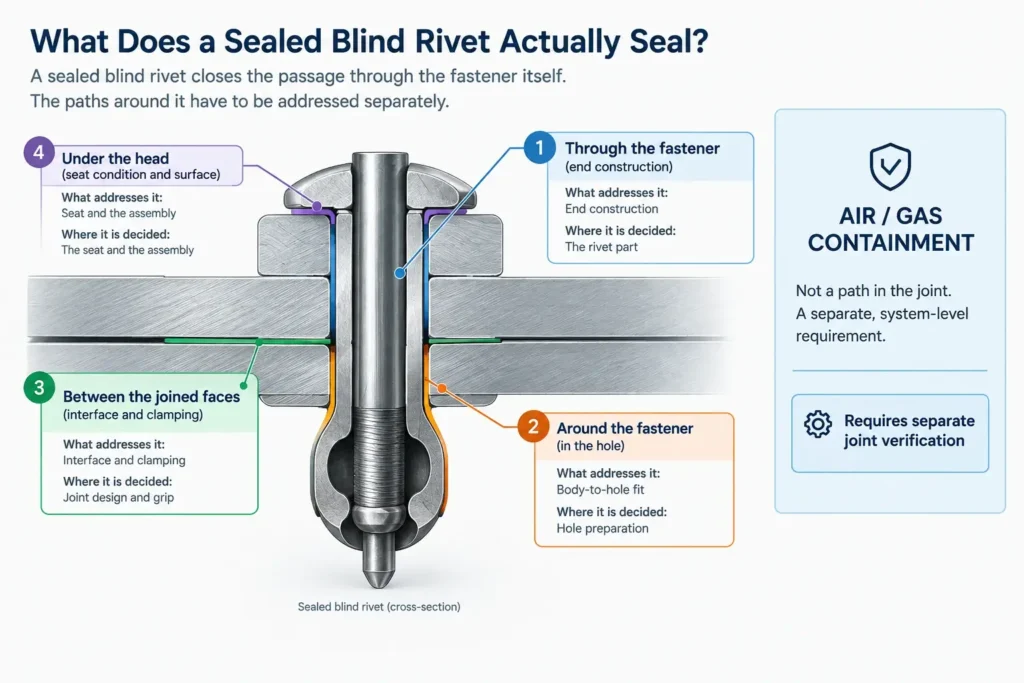
Most of the confusion comes from treating a sealed rivet as a sealed joint.
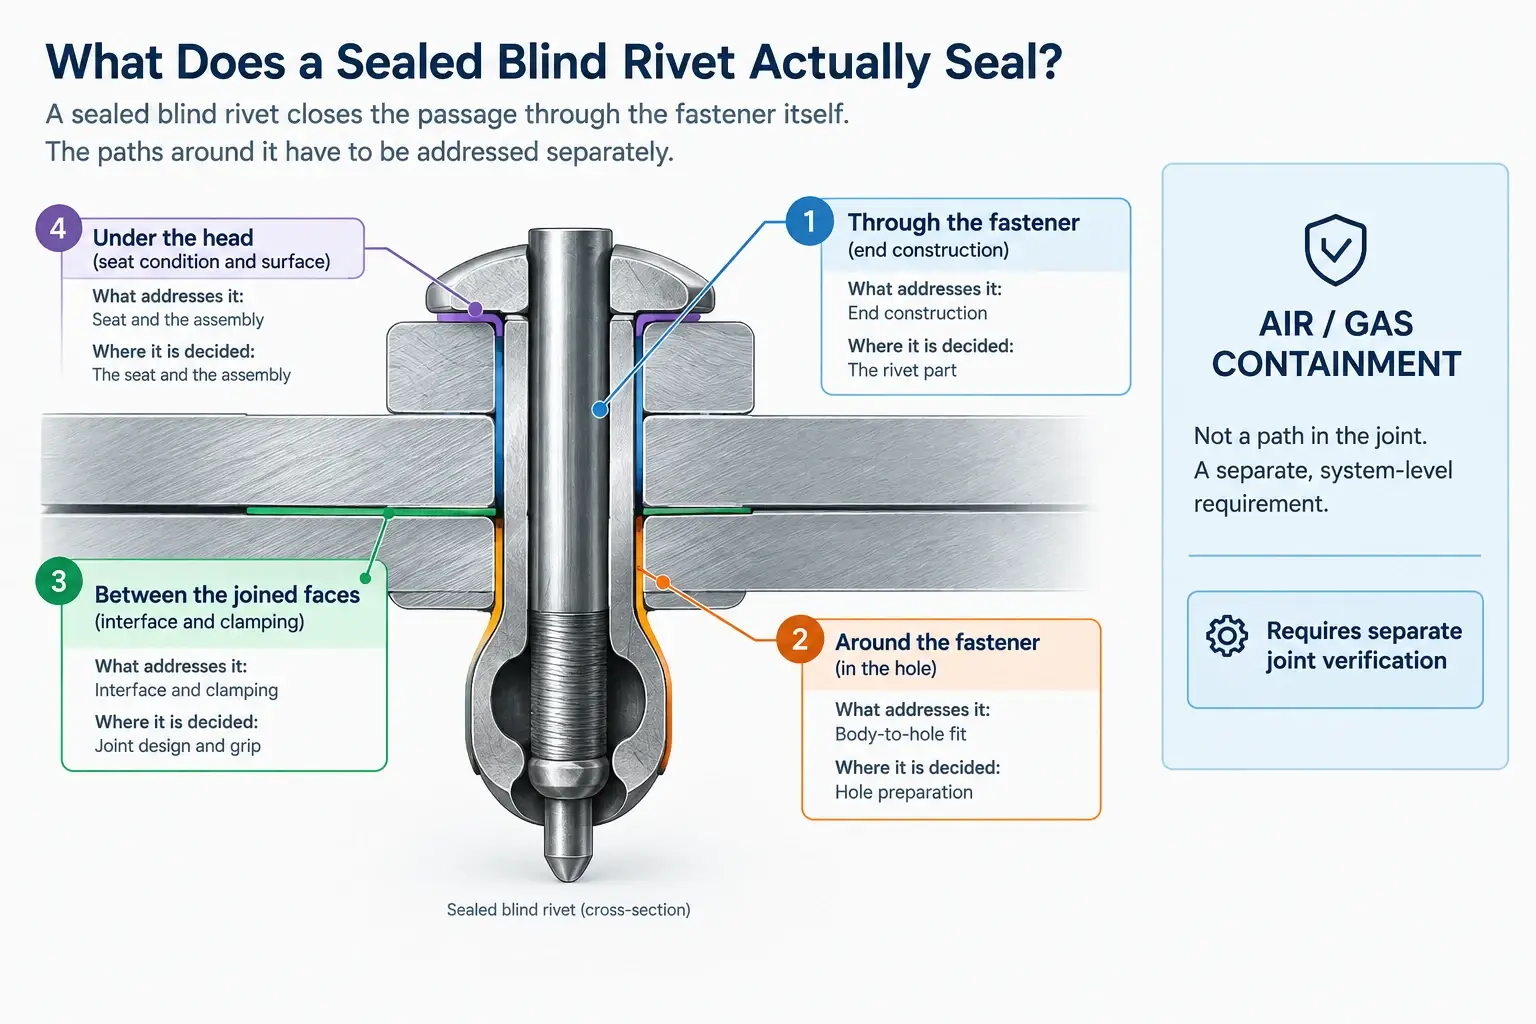
A joint can have four physical paths that need to be considered: through the fastener, around the fastener in the hole, between the joined faces, and under the head at the bearing surface. A sealed blind rivet addresses only the first.
Sealing is a property of the assembled joint, not of the part alone.
Table 2 — The Paths in a Joint
| Path in the joint | What addresses it | Where it is decided |
|---|---|---|
| Through the fastener body | End construction | The rivet part |
| Around the fastener, in the hole | Body-to-hole fit | Hole preparation |
| Between the joined faces | Interface and clamping | Joint design and grip |
| Under the head, at the bearing surface | Seat condition and surface | The seat and the assembly |
Air or gas containment is not a fifth path in the joint. It is a separate, system-level requirement, addressed by an engineered sealing solution rather than by a rivet end.
Watertight and airtight are different requirements, and a rivet end does not address them in the same way. A joint that resists liquid entry is not necessarily suitable for air or gas containment. That requirement should be verified separately.
Where the hole is the limiting path, our guide to blind rivet hole size covers that fit.
How to Choose a Sealed Blind Rivet
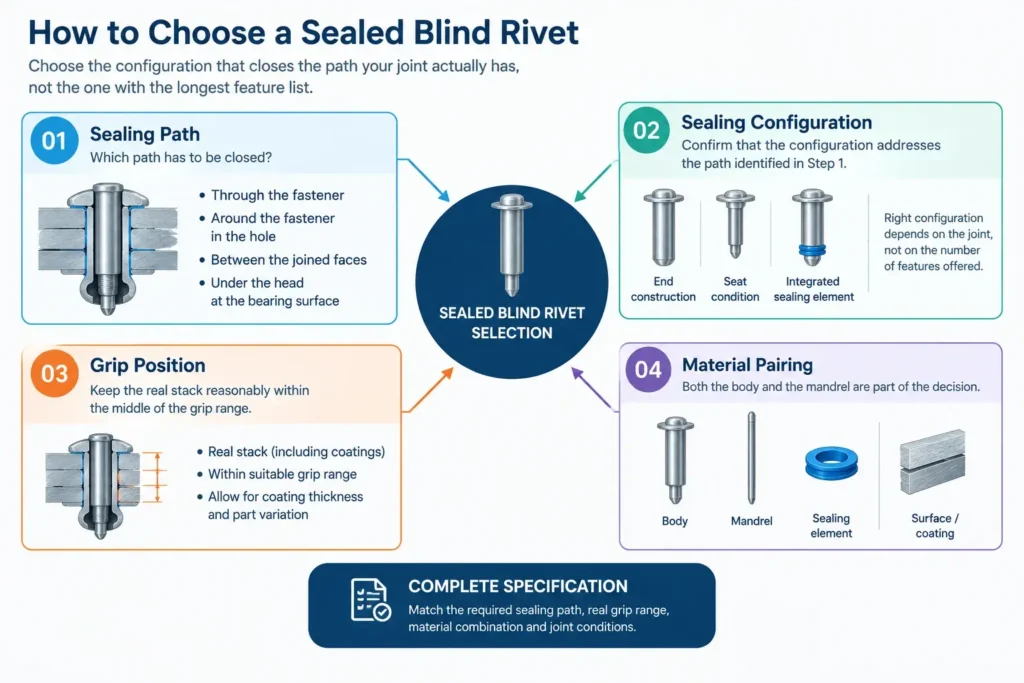
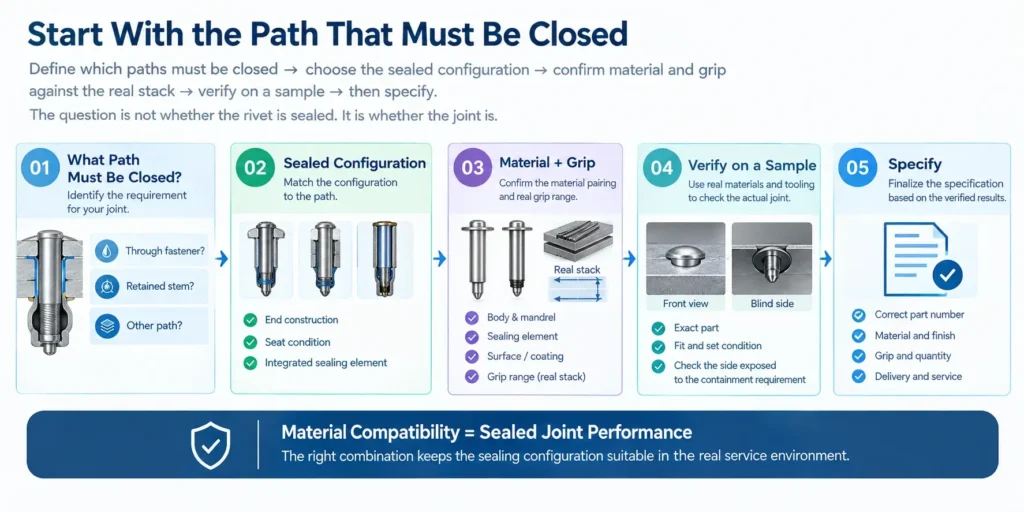
A sealed family shares one principle and differs in a few practical ways. Sealed blind rivet selection therefore starts with the path. Choose the configuration that closes the path your joint actually has, not the one with the longest feature list.
1. Start with the sealing path. Which path has to be closed decides everything after it: the end construction, the seat condition, the sealing element and the grip position.
2. Check the sealing configuration. Confirm that the end construction, the seat condition and any integrated sealing element address the path identified in Step 1. The right configuration depends on the joint, not on the number of features offered.
3. Check the grip position. As a general starting guideline, keeping the real stack reasonably within the middle of the grip range can provide a more predictable set than working at the range limits. A stack close to a grip-range limit also gives less allowance for coating thickness or normal part variation.
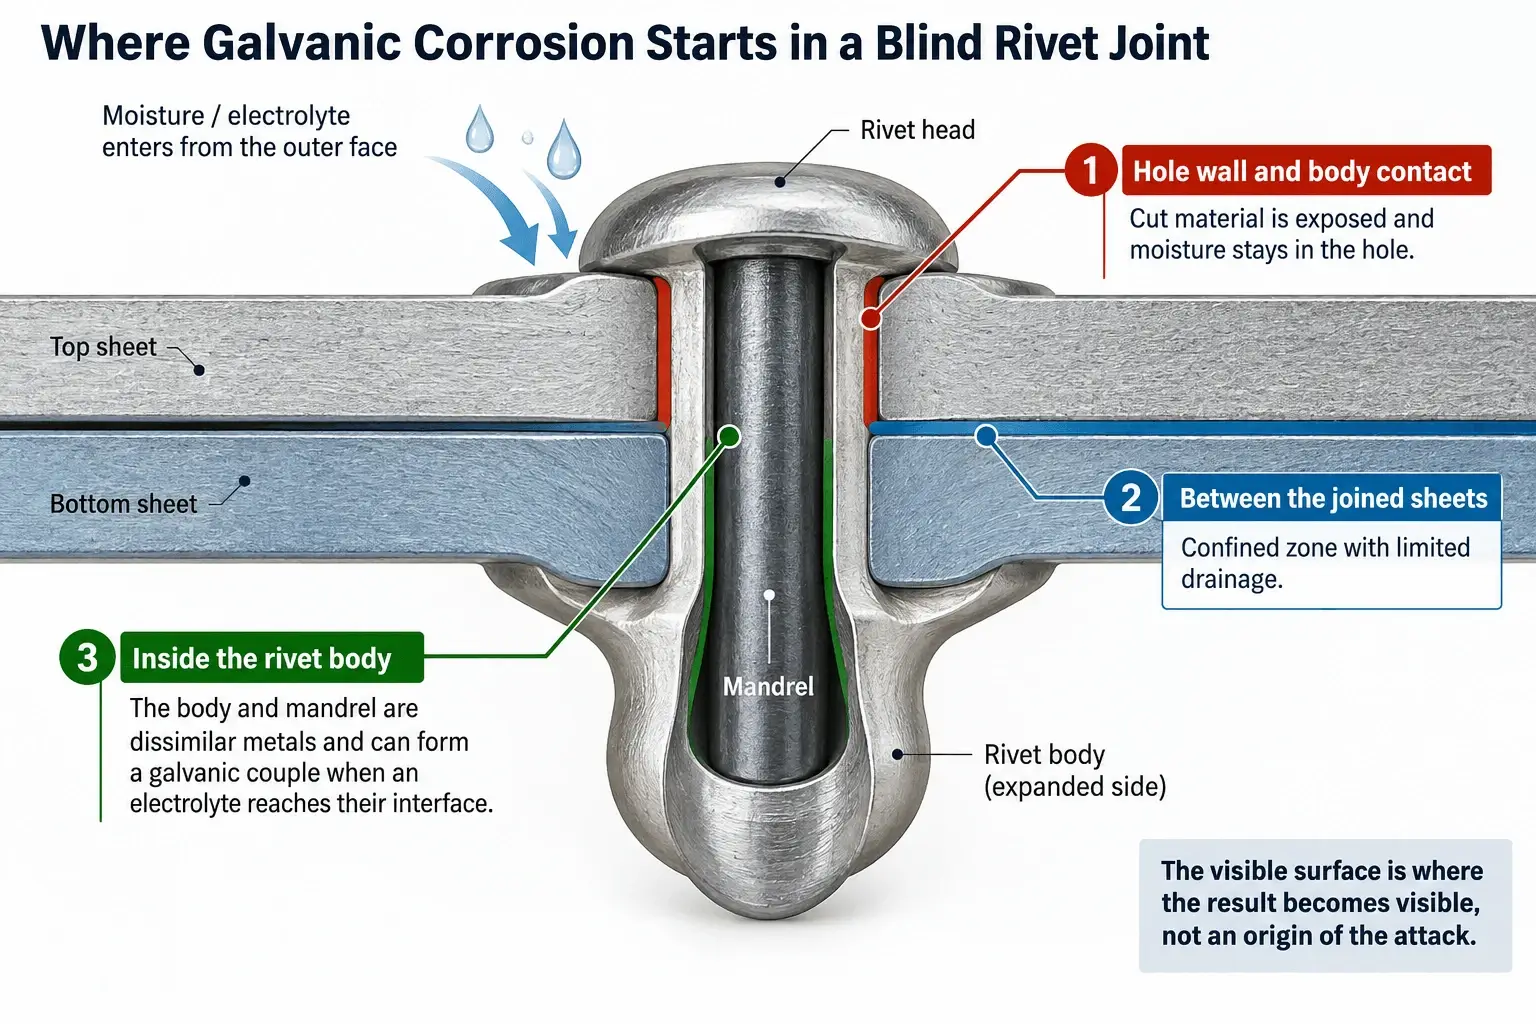
4. Check the material pairing. The body and the mandrel are two materials in one part; both belong to the decision.
The result should be a complete specification that matches the required sealing path, the real grip range, the material combination and the joint conditions. A feature bought for a path the joint does not have is never used.
Where the question is whether an option is a real, orderable specification, our guide to how to read a blind rivet datasheet covers the fields to check.
What Are the Benefits — and What Don’t They Solve?
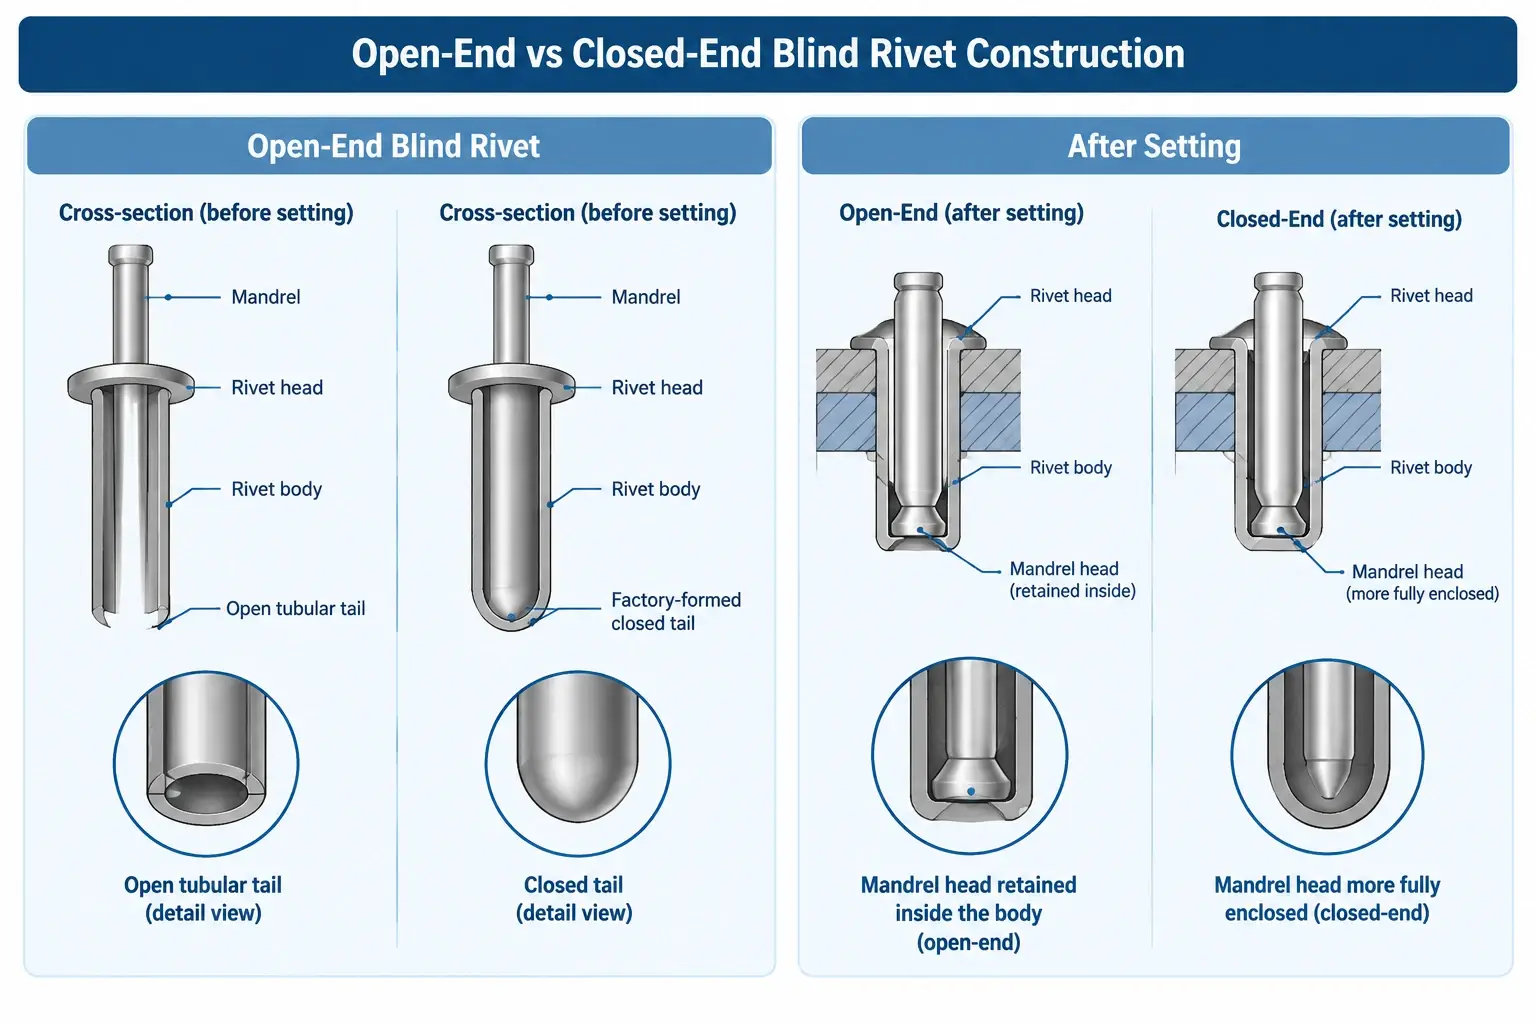
What it can provide: the passage through the fastener is closed; the retained stem is enclosed within the rivet body in the sealed configuration, which matters where loose metal inside a cavity is a problem; and where an integrated sealing element is part of the rivet, an added sealing step may sometimes be avoided.
What it does not automatically provide: it is not a strength upgrade — joint strength is a separate question; it is not a pressure-rated part; and it does not replace the hole or the joint design.
The benefit is conditional: it exists where the requirement exists, and it is a cost where the requirement does not.
Where a joint has no containment requirement, the choice between open-end vs closed-end blind rivets is made on other grounds.
How Material Selection Affects Sealing
Material selection affects whether the sealing configuration remains suitable in the service environment.
The first question about a material combination is not strength but whether it stays suitable in the environment the joint will see. The durability of a sealing configuration follows from the fastener and joint system it sits in, not the other way round.
Both the body and the mandrel are part of that answer — one rivet is already a combination of two materials — and so are the material of any integrated sealing element and the surface treatment or coating on the parts. In damp, salt or chemical exposure, that combination carries more weight. The point is not to rank materials, but to confirm the combination fits the exposure the joint will see.
The sealing configuration should remain suitable for the expected service environment and service life of the joint.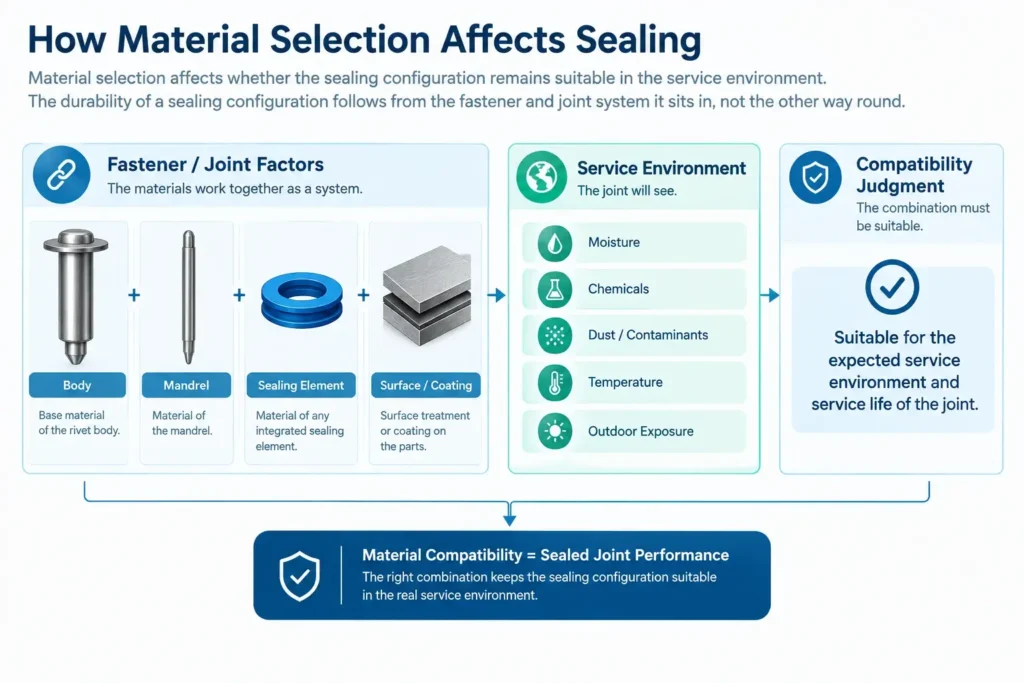
How to Verify the Configuration Before Ordering
Specifying from a product name is the most common way a sealing decision goes wrong. A sealed configuration is confirmed on a sample, not assumed from a part number.
Six checks help confirm that the selected part suits the actual joint.
Table 3 — Verify Before You Order
| What to verify | How | What a problem looks like |
|---|---|---|
| The exact part | Against the data for that part number | Selected from a family name without confirming the exact part |
| Real stack inside the grip range | Measure the real stack, including coatings | Stack at or beyond a range limit |
| Body-to-hole fit | Measure the prepared hole on real parts | Oversized or ragged holes |
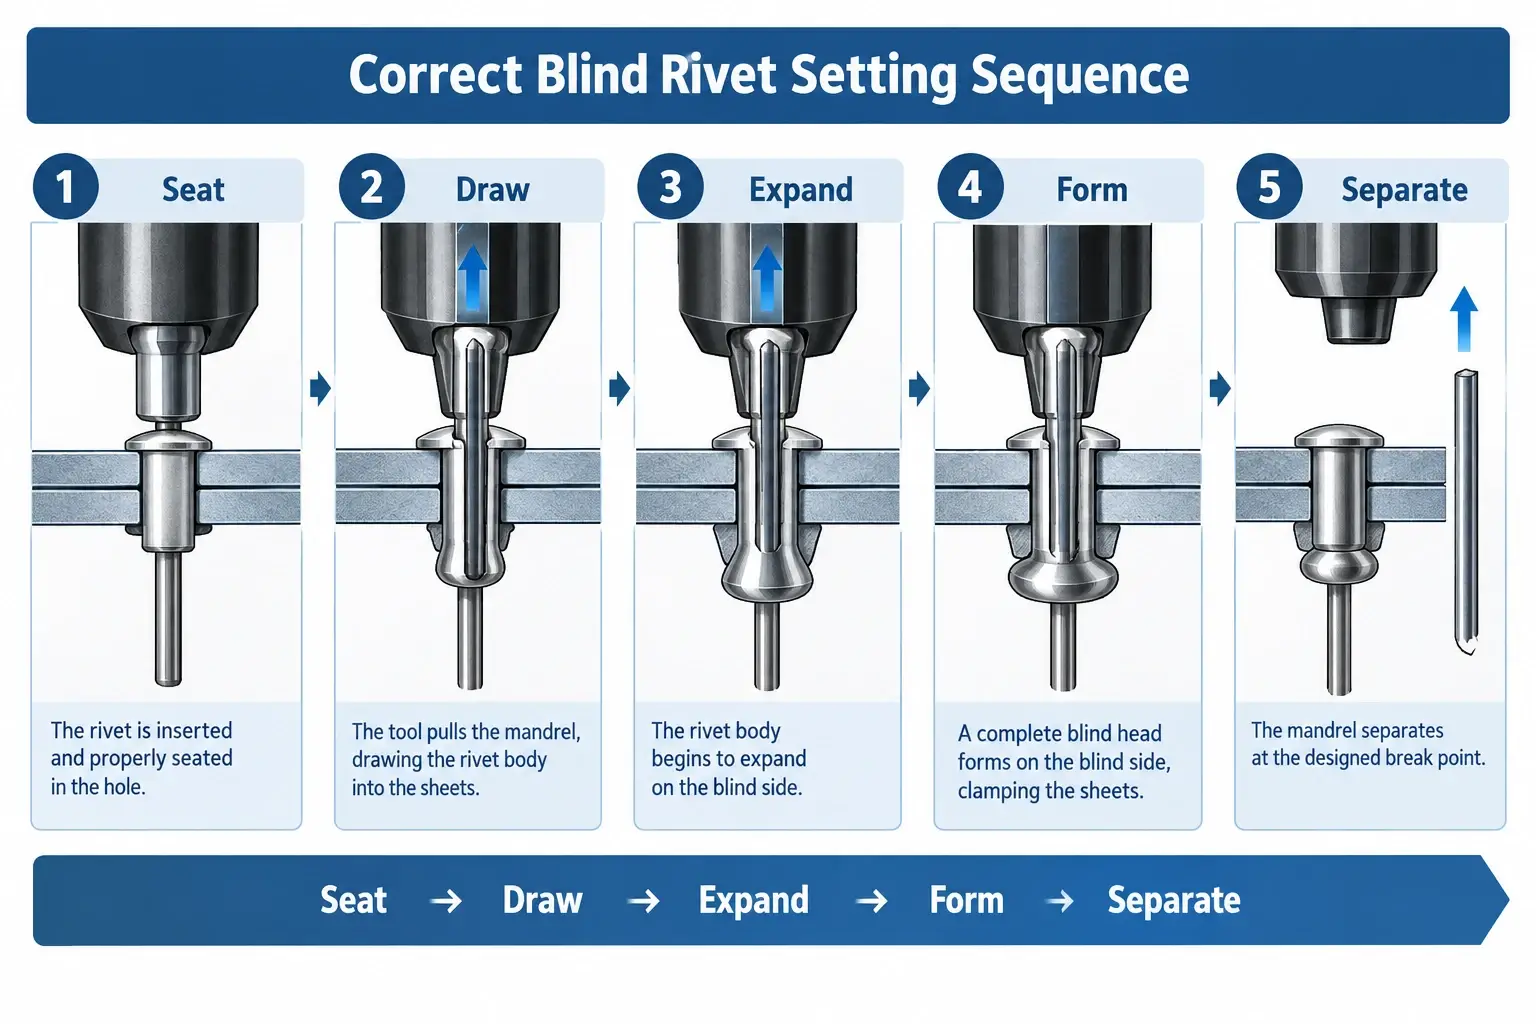
| A complete set | Stem enclosed, head seated flat | Head proud, stem not enclosed |
| The path being closed | Match the configuration to the path it must close | Features specified without a matching path |
| The sample | Real materials, real stack, production tooling; check the far side | Looks correct from the front; the containment requirement is not met on the exposed side |
Two checks deserve more attention. The grip figure has to come from the real stack, coatings included: a stack measured without them can sit outside a range it appeared to fit. And the sample is the only check that sees the whole joint.
A dry front face does not confirm a sealed joint. Check the side exposed to the containment requirement.
Where the set does not complete cleanly, our guide to blind rivet setting problems covers what each symptom points to.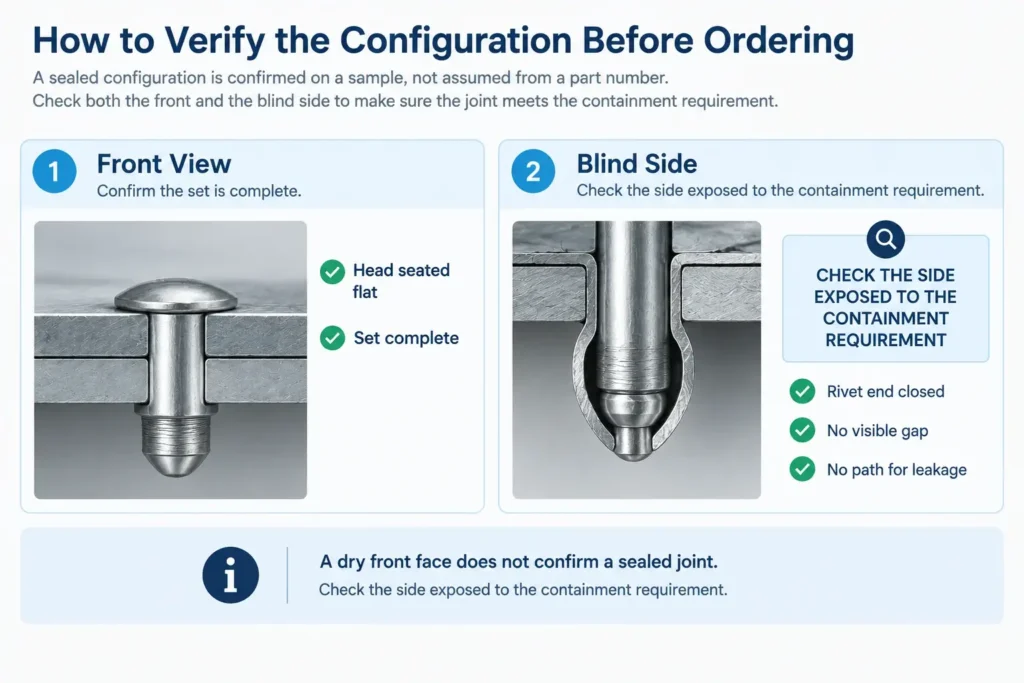
Where Are Sealed Blind Rivets Used?
The useful detail here is rarely the industry. It is which path has to be closed, and what the space behind the joint can accept.
Sealed rivet applications commonly involve a joint where the fastener passage or the retained stem needs additional containment. Common examples include:
- Equipment enclosure — reducing the passage through the fastener.
- Control cabinet — an internal containment requirement.
- Outdoor equipment — exposure that may raise the sealing requirement.
- Sensitive internal components — keeping the retained stem enclosed within the rivet body.
Whatever the industry, the actual joint requirements still have to be verified on the real parts.
Where there is no defined containment requirement, adding a sealed configuration may add cost without addressing a necessary joint function. Exposure alone does not determine the rivet type; the question is whether the path through the fastener needs to be closed.
FAQ
Short answers to the questions this topic raises most.
1. What are sealed blind rivets used for?
They are used where the passage through the fastener needs to be closed, or where the application has a defined containment requirement. A sealed configuration may also provide greater containment of the retained stem within the rivet body. They are not needed where no containment requirement exists.
2. Do sealed blind rivets need sealant?
Not always. The rivet end closes its own passage. Where the hole path, the joint interface or the bearing surface also has to be addressed, added sealing is a separate, application-specific decision.
3. Are sealed rivets airtight?
Not automatically. A sealed rivet closes the passage through the fastener, but that does not by itself make the entire joint airtight. Where gas containment matters, the complete joint must be verified separately.
4. How do I choose a sealed blind rivet?
Start from the path that has to be closed, then confirm the configuration, the grip position, the material pairing and the exact part against the real stack.
5. Are sealed blind rivets stronger?
Sealing is not a strength claim. Joint strength is evaluated from the rivet design and the joint conditions. Sealing and strength are separate design considerations.
6. How do I verify a sealed joint?
Assemble a sample with the real materials, stack and production tooling, then check the side exposed to the containment requirement. A dry front face alone does not confirm sealing.
7. Can I use a sealed configuration for a pressure application?
A sealed rivet configuration alone does not qualify a joint for pressure service. Where pressure containment is required, the connection and sealing system must be engineered and verified for that duty.
8. How do I choose the right material for a sealed blind rivet?
Material selection affects whether the sealing configuration remains suitable in the service environment. Confirm how the body, the mandrel, the sealing element and any coating behave together there, and verify on a sample.
Start With the Path That Must Be Closed
Define which paths must be closed → choose the sealed configuration → confirm material and grip against the real stack → verify on a sample → then specify.
The question is not whether the rivet is sealed. It is whether the joint is.
Send us your application, the joint materials and thickness, the expected quantity, and the service environment. Our team can help review which paths need to be closed — and what the sealed configuration should be verified against.
Send Your Details | Request a Quote
And where a joint has already failed in service, our guide to the common causes of blind rivet failure covers where to look.